If you’re planning a siding installation for your home in Cleveland, you’re making a smart investment in both aesthetics and protection. New siding can dramatically improve your home’s curb appeal, increase energy efficiency, and shield your property from the often unpredictable Ohio weather. However, many homeowners aren’t quite sure what the siding installation process actually involves.
Whether it’s your first time replacing siding or you simply want to be more informed before starting the project, this detailed guide will walk you through what to expect before, during, and after your siding installation in Cleveland.
Why Siding Installation Is Important in Cleveland
Cleveland’s climate presents unique challenges. From icy winters to humid summers, your siding serves as a critical line of defense against the elements. Properly installed siding:
- Insulates your home against extreme temperatures
- Protects the structure from moisture, mold, and pests
- Reduces energy bills through improved thermal efficiency
- Enhances the home’s resale value and exterior appearance
Because of these factors, hiring a professional and knowing what the process entails are key to a successful project.
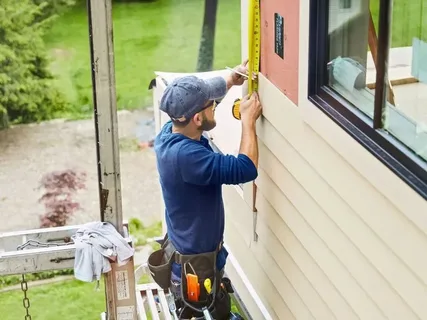
Step 1: Consultation and Estimate
The first phase is the consultation, where a siding contractor assesses your home, discusses materials, and provides an estimate. During this visit, expect the contractor to:
- Inspect your current siding for damage or moisture issues
- Take measurements of the home’s exterior
- Recommend suitable siding types (vinyl, fiber cement, wood, or engineered wood)
- Provide color and style options
- Discuss timelines and estimated cost
A reputable Cleveland siding contractor will also answer any questions you have about the process, warranties, and expected disruptions.
Step 2: Choosing the Right Siding
After your initial consultation, you’ll need to choose a siding product that matches your style, budget, and performance goals. Some of the most common siding options in the Cleveland area include:
- Vinyl siding – Affordable, low-maintenance, and weather-resistant
- Fiber cement – Durable and fire-resistant, great for Cleveland’s extreme conditions
- Wood siding – Offers natural beauty but requires regular maintenance
- Engineered wood – A more durable and eco-friendly alternative to traditional wood
Color, texture, and insulation options also come into play. Many Cleveland homeowners prefer insulated vinyl or fiber cement siding for maximum energy efficiency.
Step 3: Scheduling the Project
Once materials are selected and contracts are signed, your contractor will schedule the siding installation. Cleveland’s weather can affect project timing, so keep in mind that delays may occur during heavy rain, snow, or extreme cold.
Tip: Aim for siding replacement in spring, summer, or early fall for optimal conditions.
Step 4: Preparing Your Home for Installation
To make the siding installation process as smooth as possible, there are a few things you can do to prepare:
Exterior Prep
- Trim back trees, shrubs, and bushes around the home
- Remove patio furniture, potted plants, and lawn decor to create a clear workspace
- Secure pets indoors to prevent stress or accidents
Interior Prep
- Take down wall hangings on the exterior-facing walls (vibrations during installation may cause them to fall)
- Move valuables and fragile items away from the exterior walls
Contractors often bring a dumpster to collect old siding and debris, so clear your driveway or curb area to give them space to work efficiently.
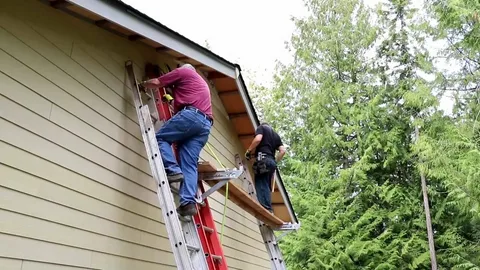
Step 5: Removal of Old Siding
The next step involves tearing off the existing siding. This allows the contractor to inspect the sheathing and wall structure underneath for any damage, mold, or rot.
Expect the area around your home to be a bit noisy and dusty for a day or two during this phase. Professionals will take care to:
- Protect windows and landscaping
- Safely dispose of old siding material
- Clean up the job site regularly
If any structural damage is found, it may delay the project slightly, but addressing it now ensures your new siding performs at its best.
Step 6: Wall Preparation and Insulation
After the old siding is removed, the contractor will prepare the walls for the new siding. This includes:
- Installing house wrap or weather-resistant barrier (WRB)
- Replacing or reinforcing damaged sheathing or flashing
- Adding insulation board or foam panels for better thermal efficiency
This stage is crucial for Cleveland homes because it provides moisture protection and insulation—key to withstanding Northeast Ohio’s weather extremes.
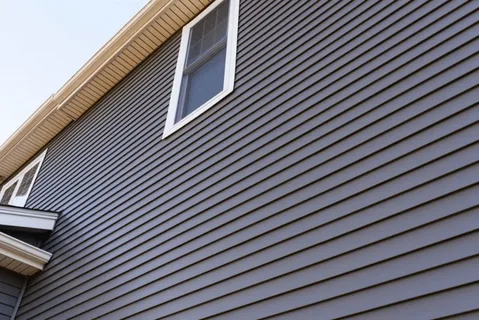
Step 7: Installing the New Siding
Now the transformation begins. The new siding is installed section by section, usually starting from the bottom and working up. The crew will:
- Use starter strips and J-channels to ensure clean lines and secure installation
- Fit siding panels tightly to minimize gaps and prevent water infiltration
- Cut panels precisely around windows, doors, and utility penetrations
- Caulk and seal seams to enhance weather resistance
Depending on the size of your home and the type of siding, this phase can take anywhere from 2 to 7 days.
Step 8: Final Touches and Inspection
After the siding is installed, contractors will add finishing touches such as:
- Trim and fascia boards
- Soffit replacement
- Caulking, painting (if needed), and sealing
- Clean-up of debris and tools
A final walk-through or inspection will be conducted to ensure everything meets the agreed specifications. This is your opportunity to:
- Ask questions
- Verify that all areas are properly sealed
- Discuss warranties and maintenance tips
Step 9: Post-Installation Maintenance Tips
Good siding is an investment that lasts 20 to 50 years depending on the material, but some maintenance will help extend its lifespan:
- Rinse with a hose once or twice a year to remove dirt and grime
- Inspect annually for any cracks, gaps, or moisture damage
- Re-caulk joints as needed to prevent water penetration
- Avoid high-pressure washing, especially with vinyl or fiber cement siding
Your siding contractor may provide a specific care guide depending on the materials used.
How Long Does Siding Installation Take?
For most Cleveland homes, siding installation takes 5 to 10 days, assuming weather cooperates and no major repairs are needed. Here’s a quick breakdown:
Consultation & Estimate: 1–2 days
Material Selection & Ordering: 2–7 days
Old Siding Removal: 1–2 days
Wall Prep & Insulation: 1–2 days
New Siding Installation: 2–5 days
Final Touches & Clean-Up: 1 day
Why Choose Local Experts for Siding Installation?
Hiring a Cleveland-based siding contractor offers several advantages:
- Familiarity with local weather and building codes
- Faster response times
- Stronger warranties and accountability
- References from local homeowners
Local pros understand how Cleveland’s harsh winters and humid summers affect your home—and they’ll install siding designed to handle it.
Trust Atlas Roofing & Restoration for Your Siding Needs
When it comes to siding installation in Cleveland, Atlas Roofing & Restoration stands out for their craftsmanship, transparency, and customer care. With years of experience in Northeast Ohio, Atlas is a trusted name for siding, roofing, and exterior renovations.
Their team uses high-quality materials, follows industry-best practices, and takes the time to ensure your home is not only beautiful but also protected from the elements for years to come.
Whether you’re replacing worn-out vinyl or upgrading to fiber cement siding, Atlas Roofing & Restoration will guide you through every step—from consultation to completion—with professionalism and expertise.
Ready to upgrade your home’s siding in Cleveland? Contact Atlas Roofing & Restoration today for a free estimate and experience the peace of mind that comes with working with true local professionals.